
Color Maps
Introduction
In the previous tutorial, we have learnt about the drawing of geometric shapes on the images. In this tutorial, we shall look into the different color maps and the changing of the image from one colour spectrum to another spectrum using Opencv.
Color Spectrums
We have seen the RGB that indicates Red, Green and Blue color space in the previous image processing tutorials. In the RGB model, the representation of the three colors is done as a cuboid that comprises the different color combinations.

Similar to the RGB, the other two important and famous color spaces are HSV and HSL.
HSV is known as Hue, Saturation and Value. This model is represented as the cylinder that covers the spectrum of different colours, where hue is around the surface of the cylinder, saturation as the radius of cylinder and value as height of the cylinder.

The other color space is HLS known as Hue, Lightness, Saturation andSaturation. This color spectrum is represented as the cylinder similar to the HSV, except the value is replaced with the lightness.

These are the three important color models. Other than these there are large variety of color models, which are not such important compared to these. In OpenCV to the cvt color function is responsible to change the image into different color spectrums.
Implementation
Now, let us open the jupyter notebook and work on the image to turn the image color variations into different color models.
Import the cv2 and matplotlib libraries, to perform the operations on the image.

Read the image by specifying the location of the image using cv2.imread command and display the image using the matplotlib function.

The image is displayed with different colors. As, told before in the OpenCV image basics tutorial, the image read in the OpenCV will be in the BGR format.
Now, we shall change the color format from BGR to RGB, where the image is displayed as the original image with proper colors.

In the similar way, you can convert the image from RGB format to the HLS format by using the cvt color function supported by the OpenCV library. The image looks weird and it can be identified to trace out by the human eye.

Similarly, you can convert the image to the HSV format from the RGB format. The image colors are quite different but very much similar to the HSL color format, except the lightness.

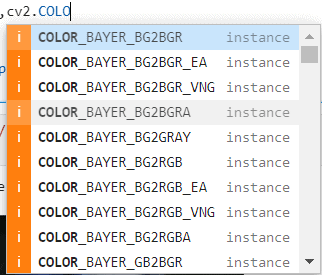
In the same way, you can get the list of all the color formats by clicking the TAB key. There will be wide range of color formats, where you can convert the image to different formats accordingly. But out of that, the most used and the human eye recognized format is the RGB color format.
This is all about the color maps and the conversion of an image into different color maps. In the upcoming tutorials, we shall discuss the blending of the different images and the masking of one image on the other. For any sort of doubts or the questions in this tutorial, you can reach out through the comment box.
Related Tutorials